
Step 1
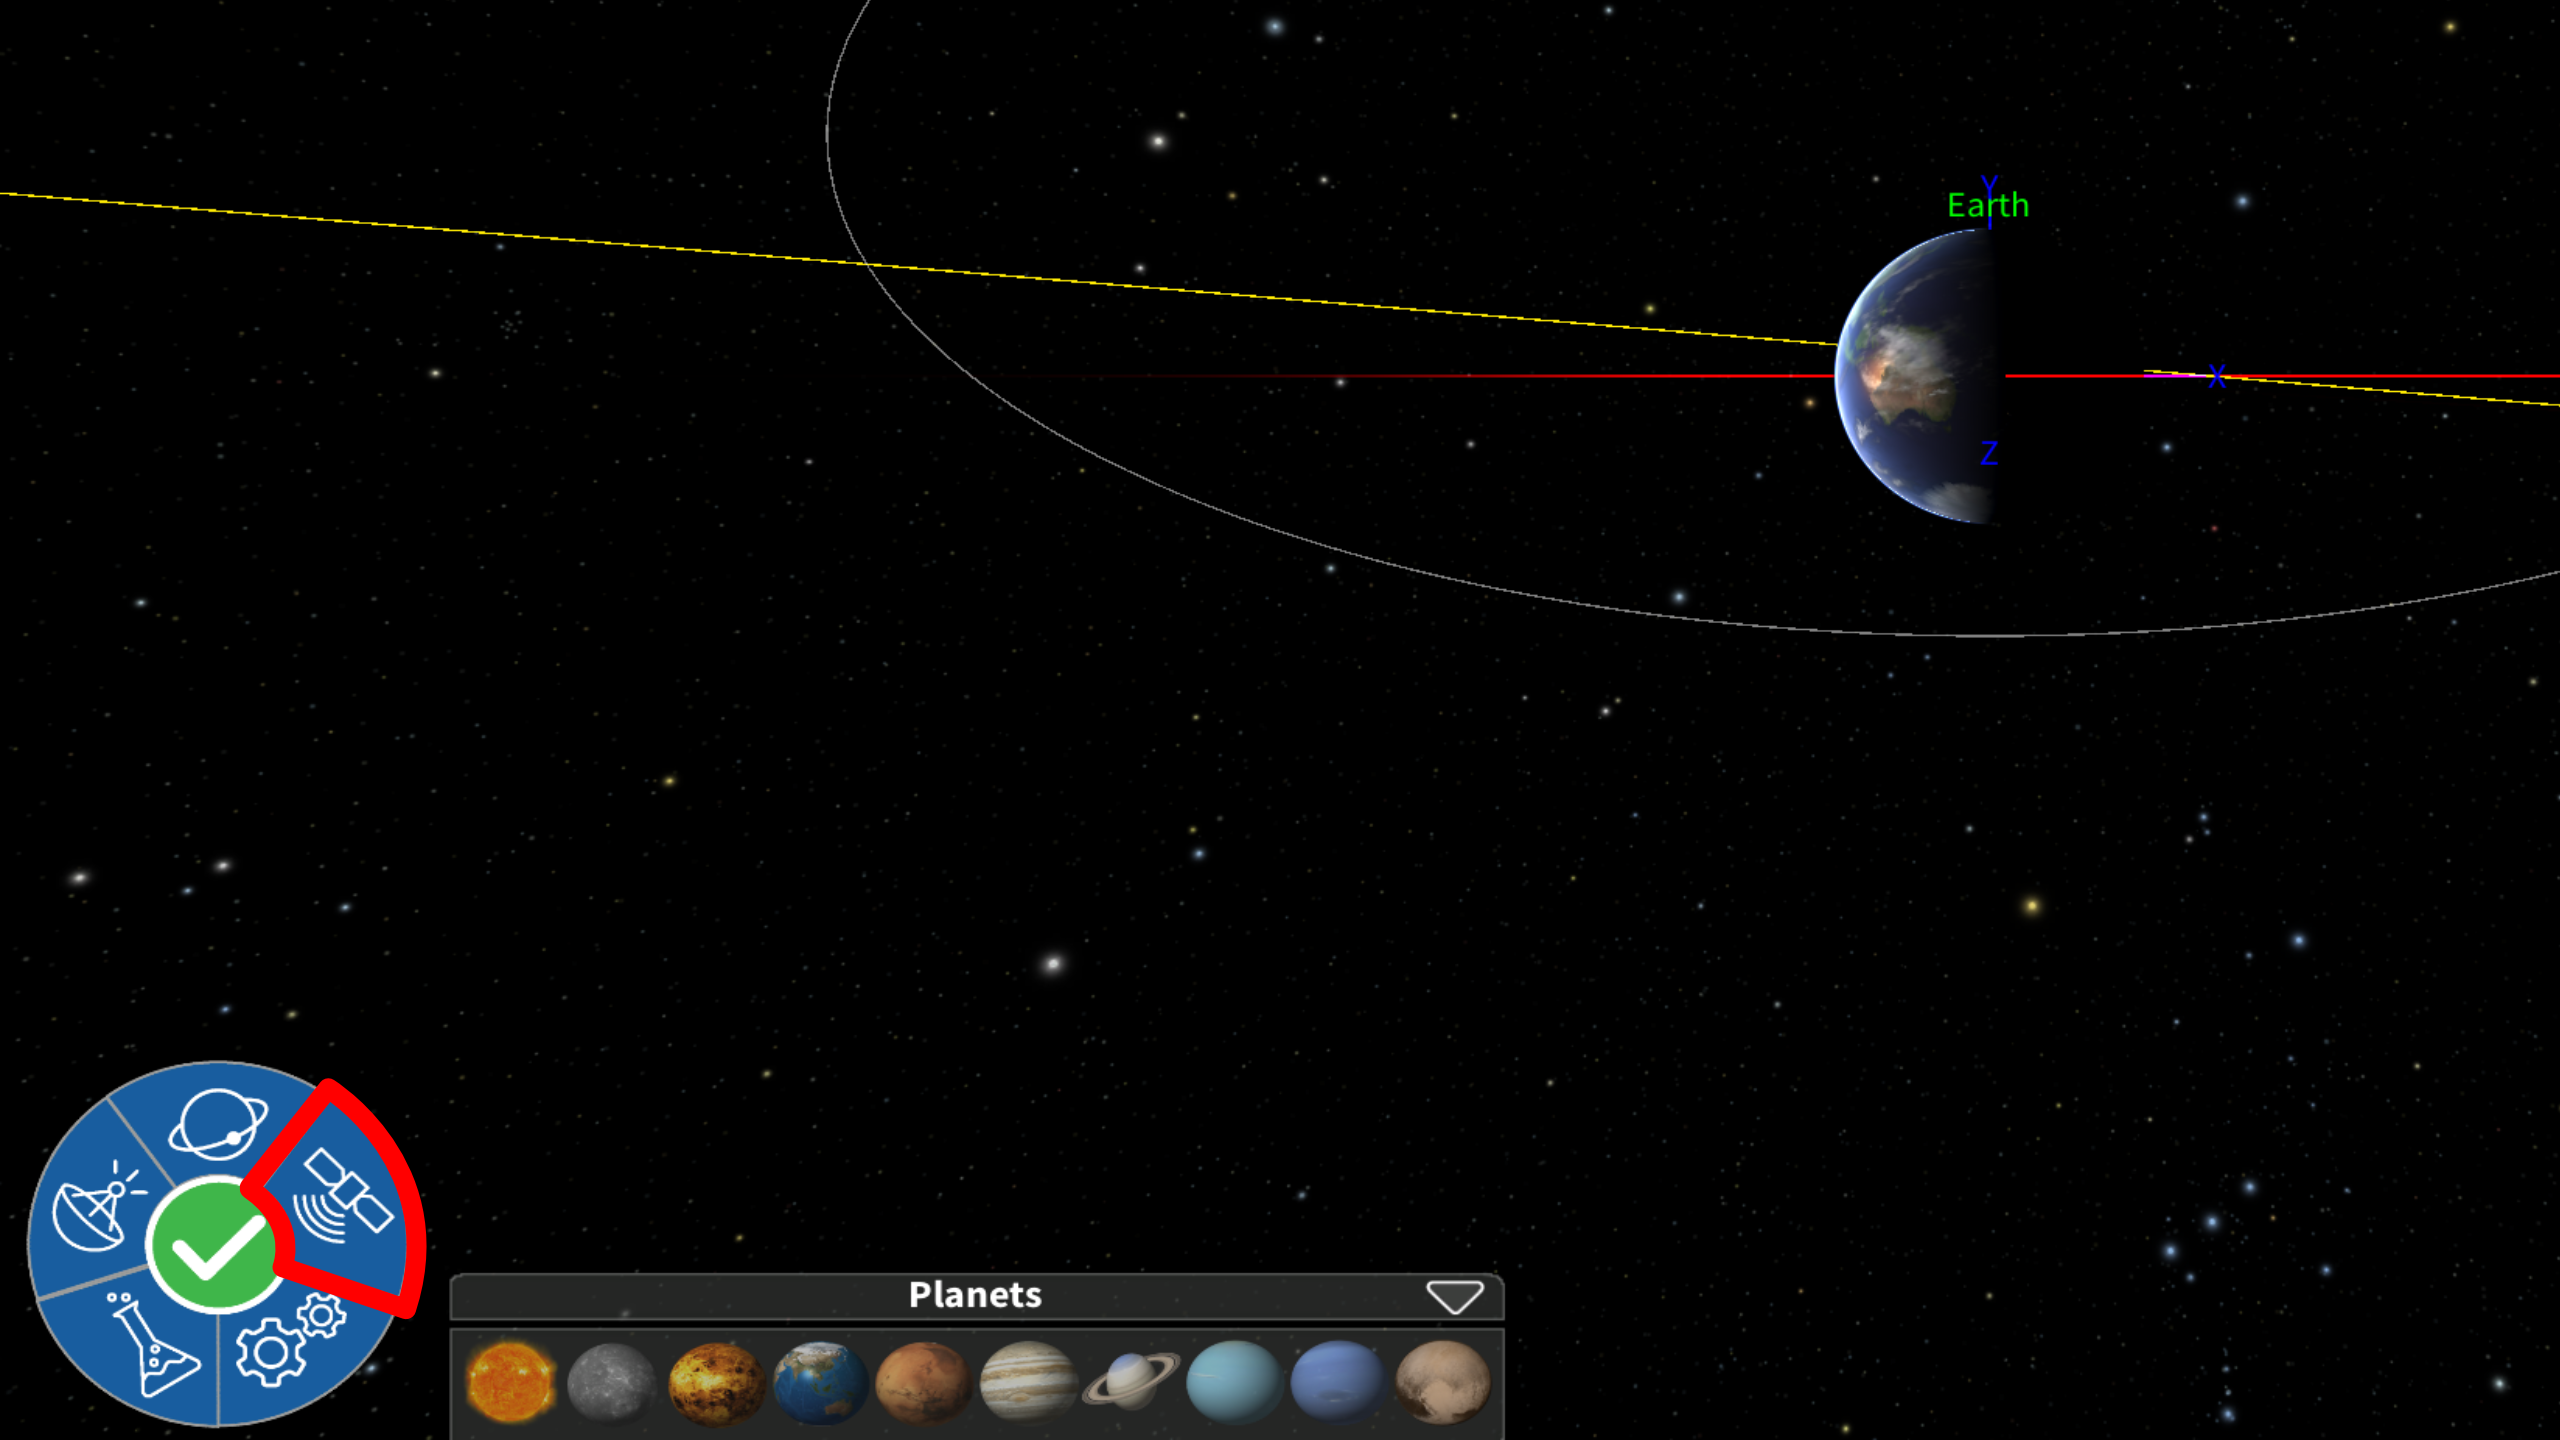
Click the ‘Satellite’ button on the P.I.G.I. menu wheel.
This should open the ‘Add Satellite’ dialog onto the screen above the main menu.
Step 2
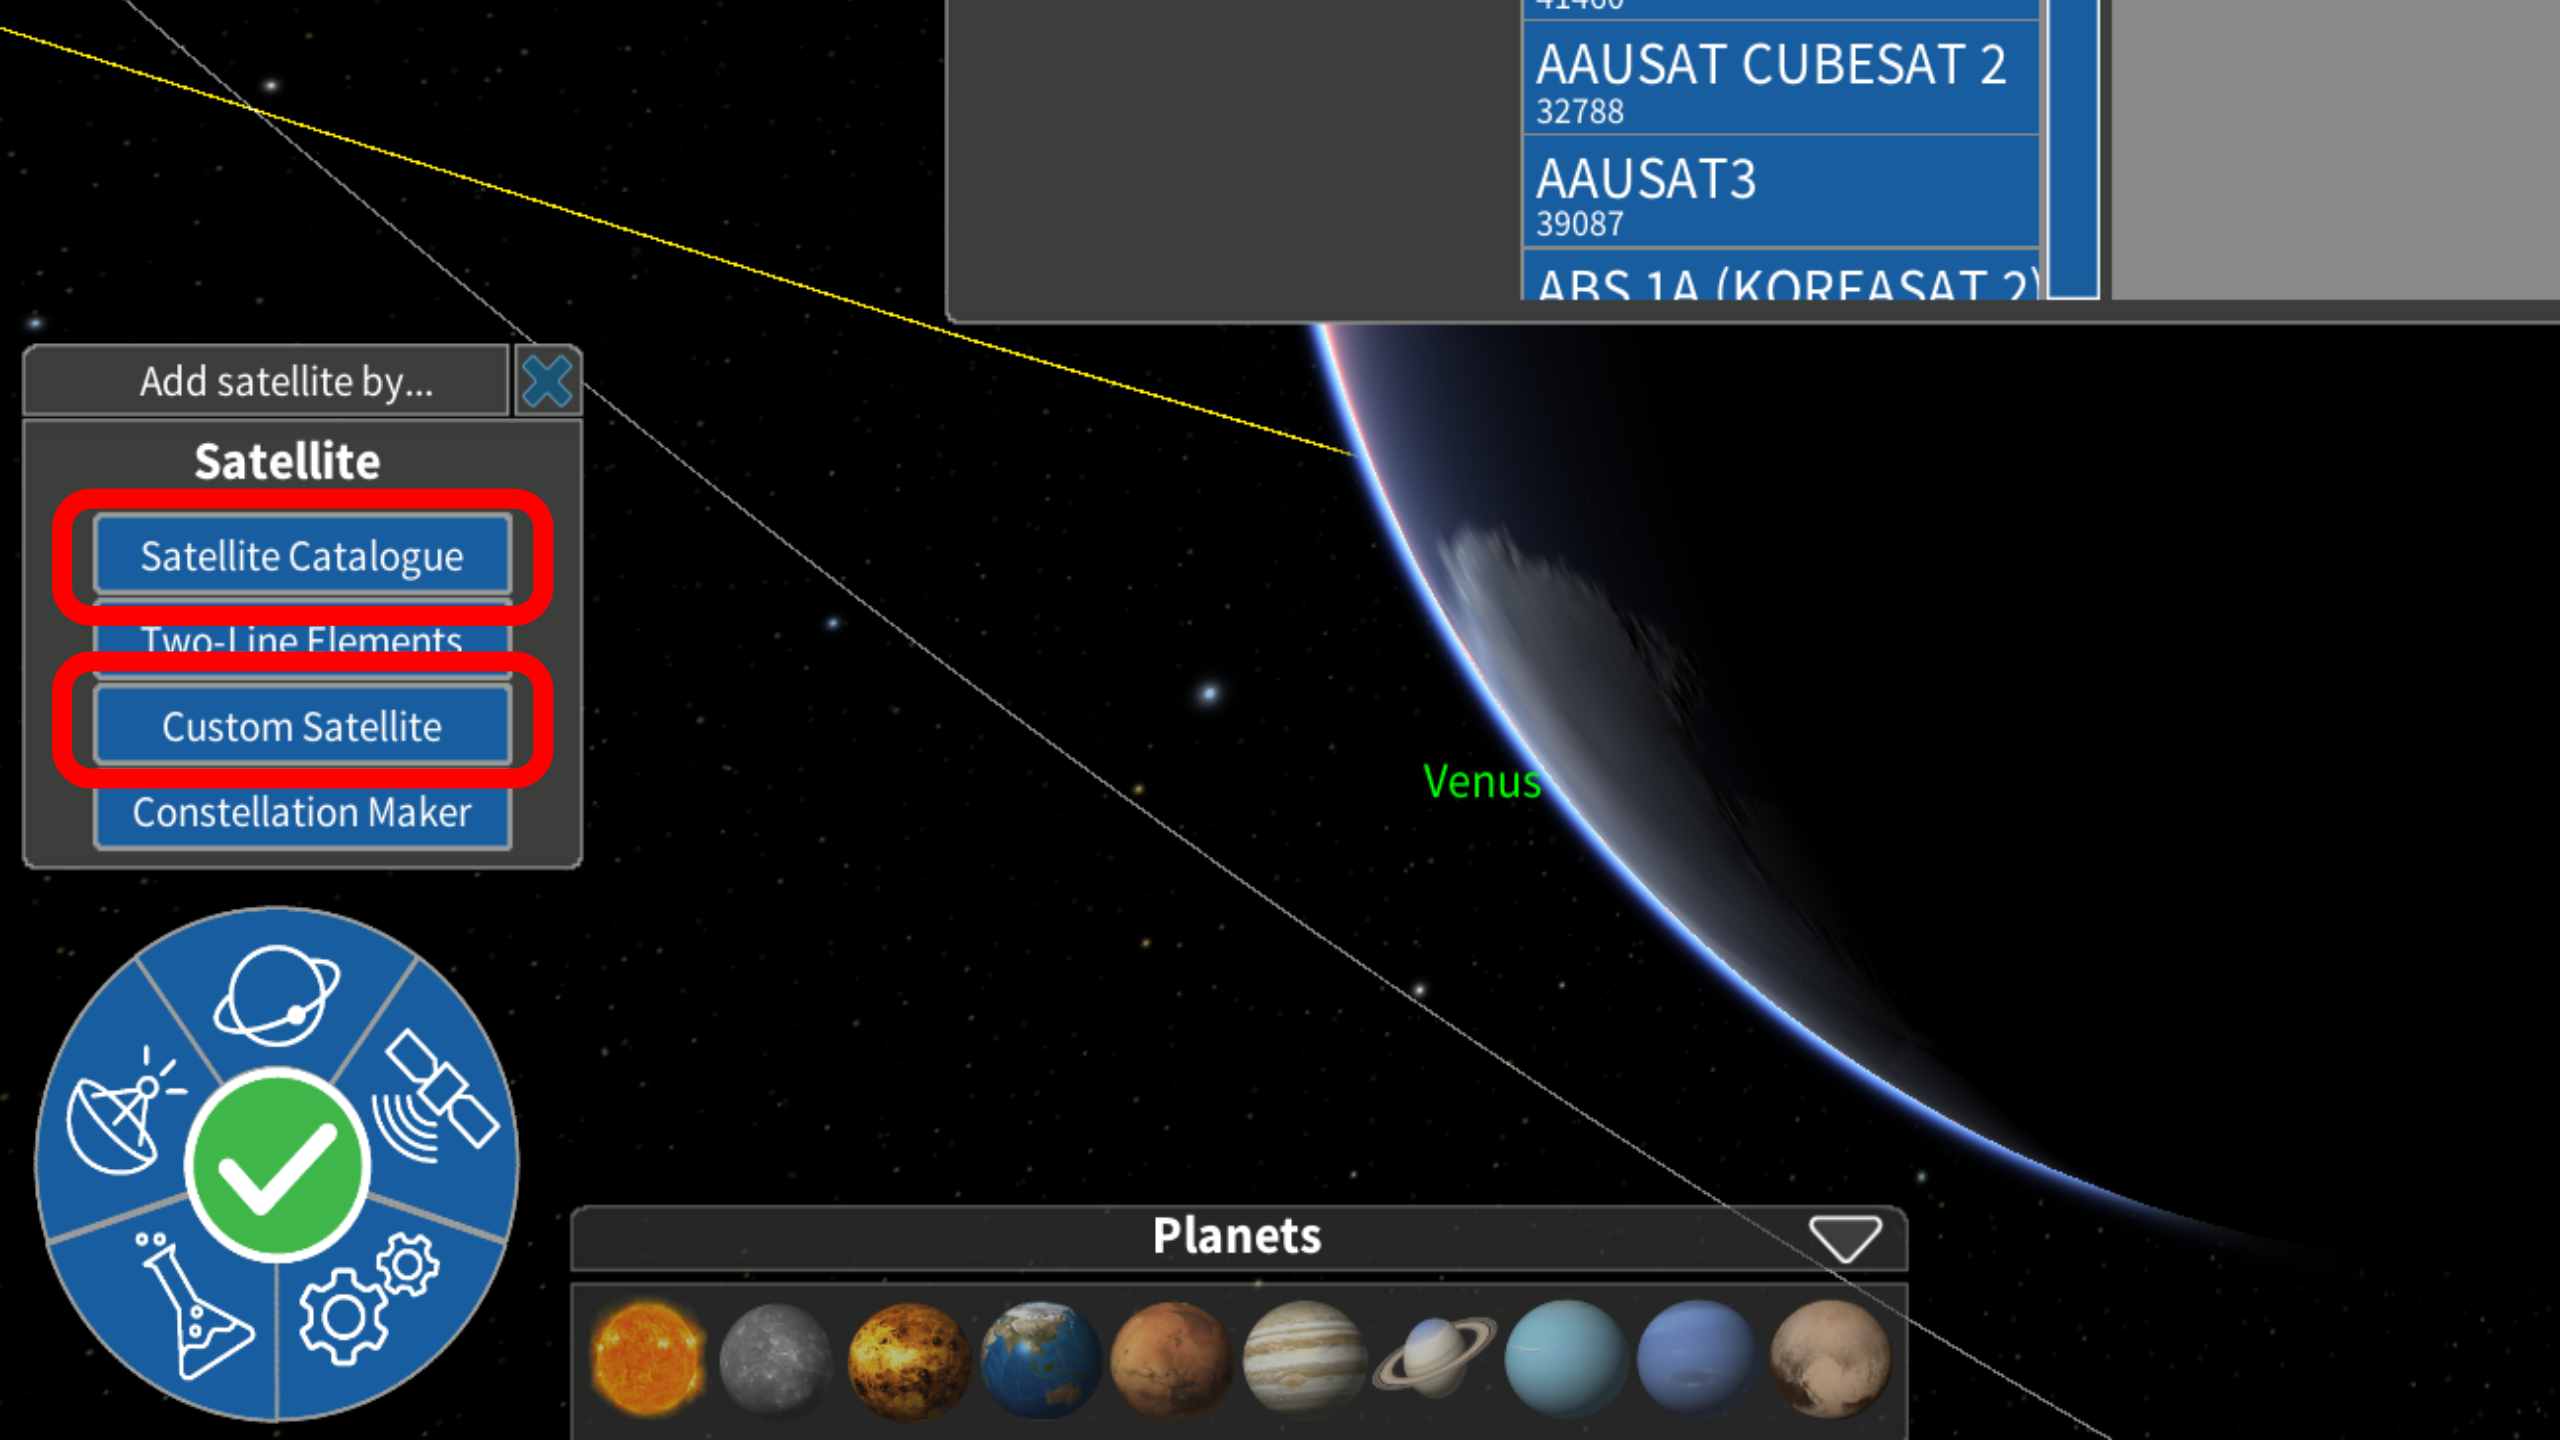
There are a few options for you to add satellites to your scene. The most important for this quest will be the custom satellite and the satellite catalogue. Clicking on either will cause a dialog box to appear on screen.
Step 3
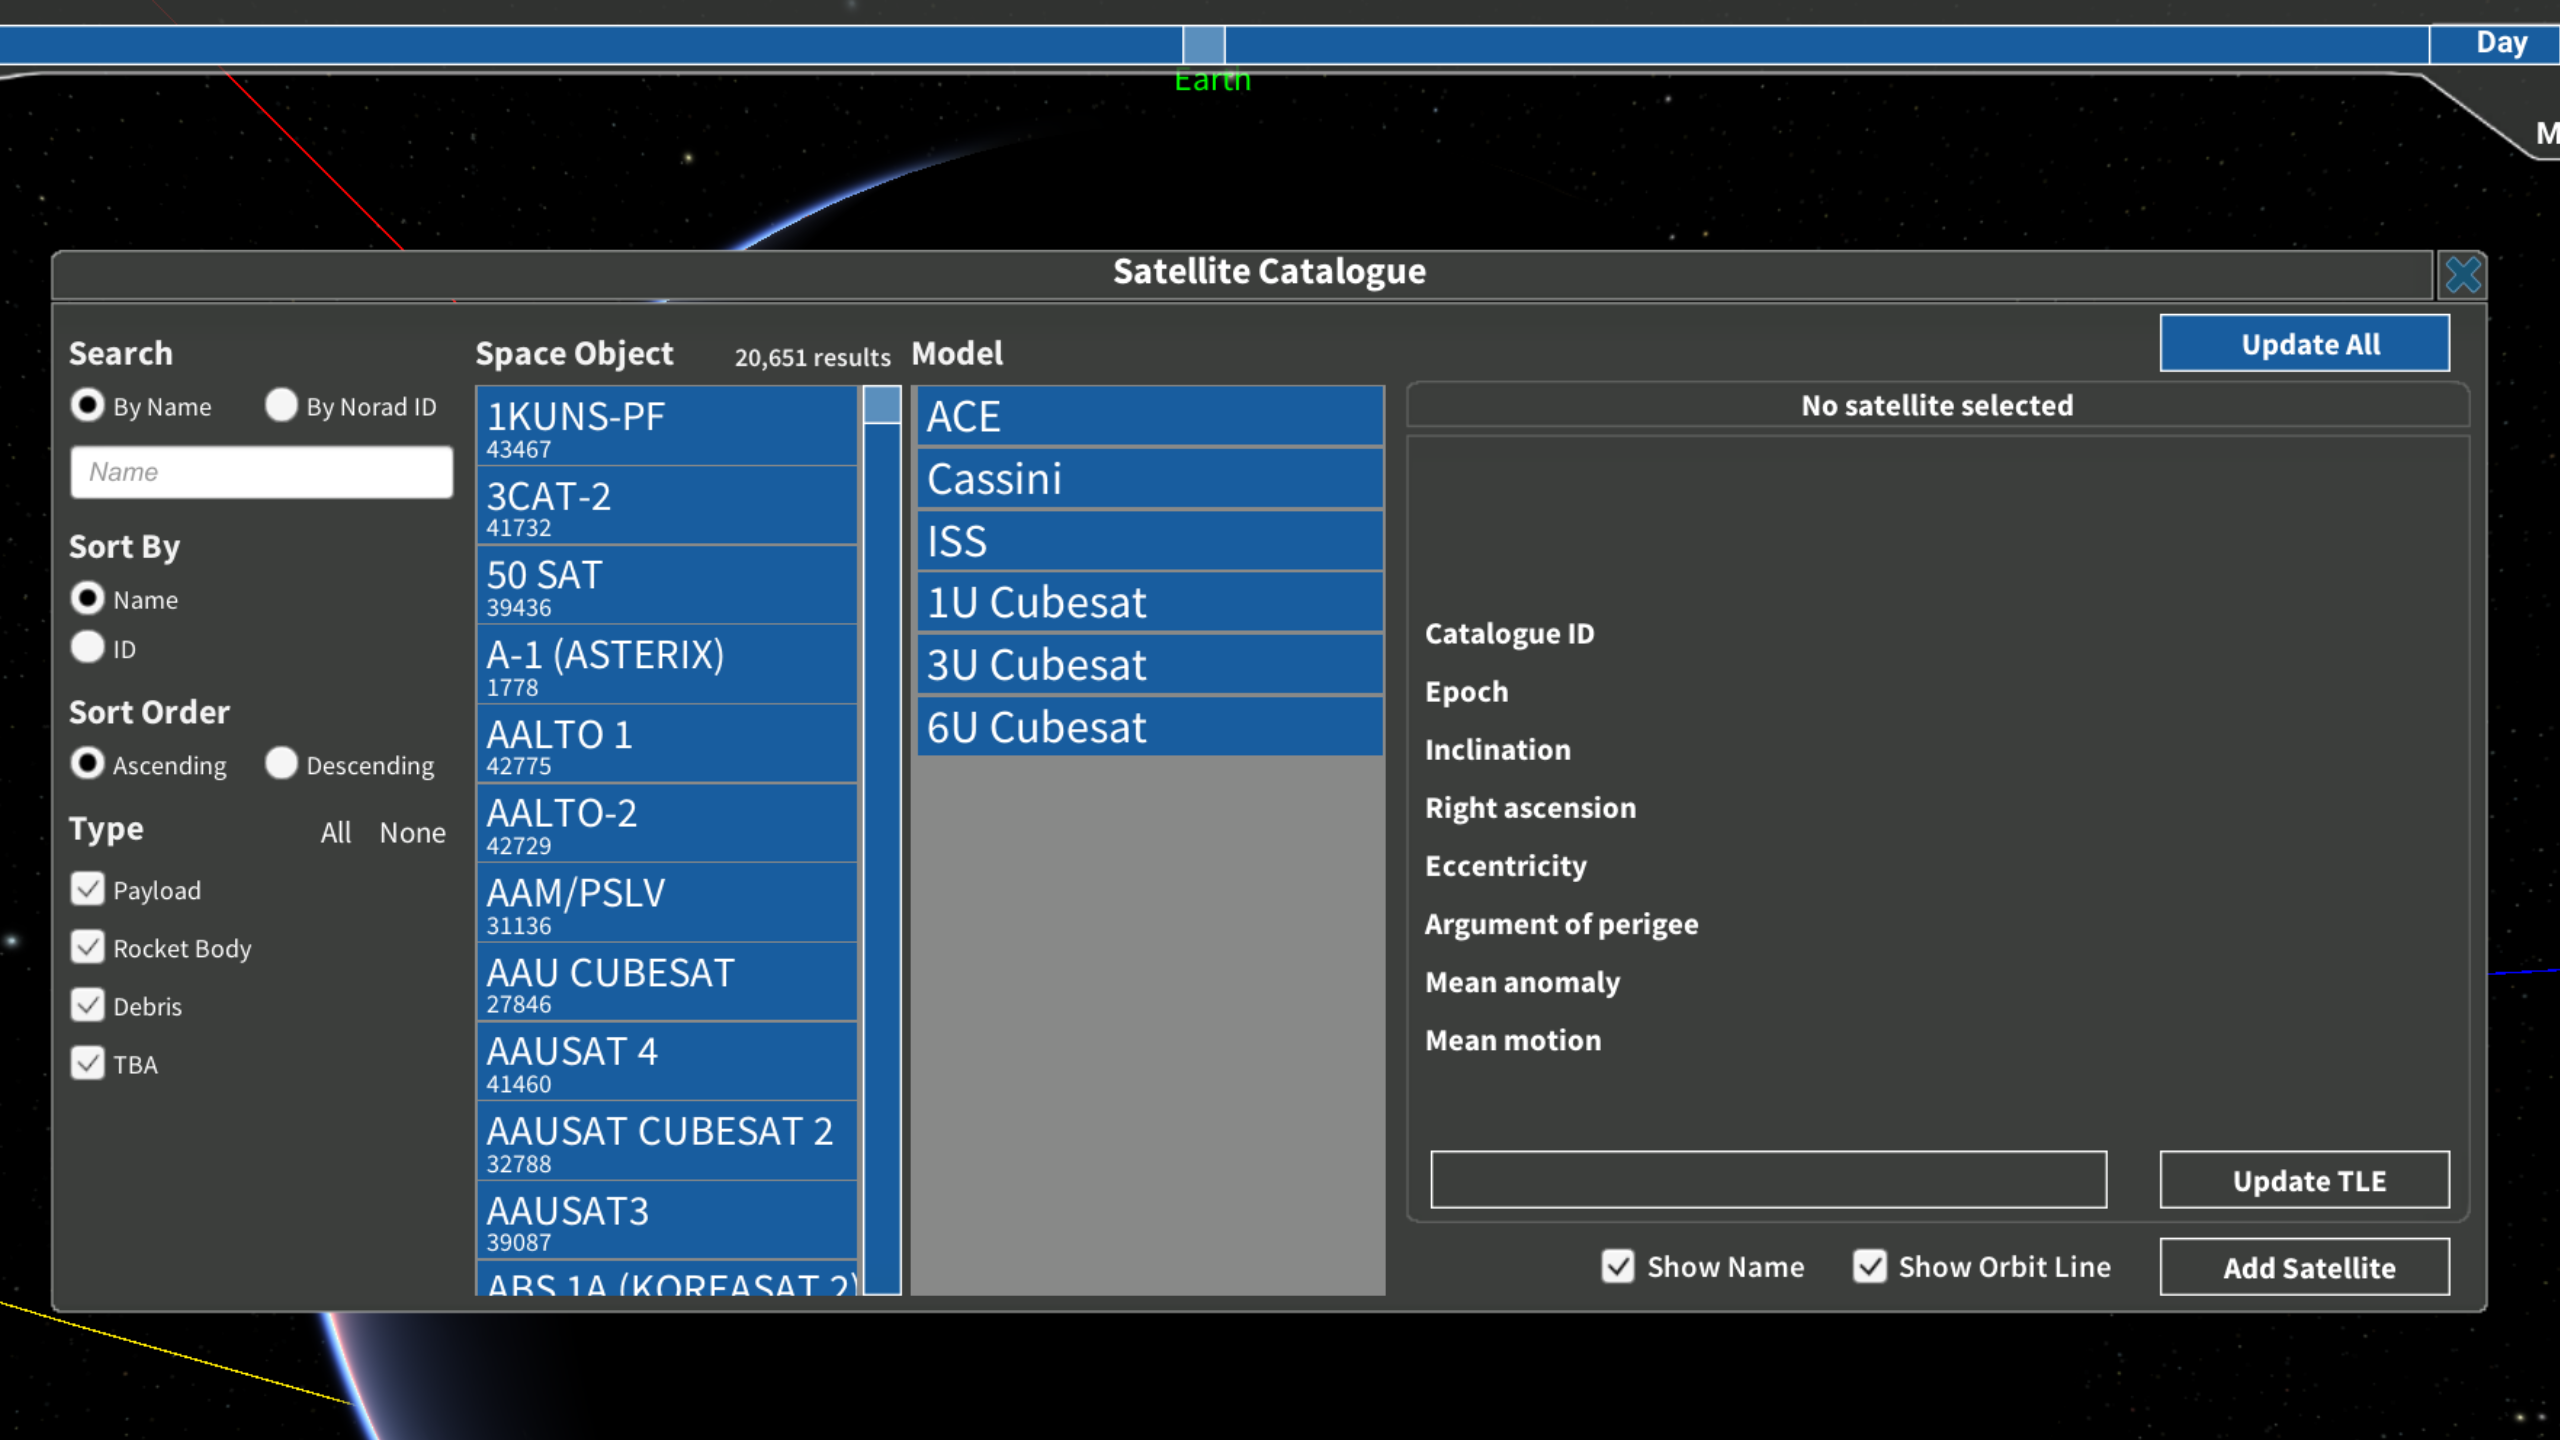
Satellite Catalogue allows you to select from a catalogue or existing satellites which are in our orbit. You are able to search by both satellite name and ID on the left, and sort and filter by various categories.Find a satellite and ensure the appropriate model of satellite is selected.
Step 4
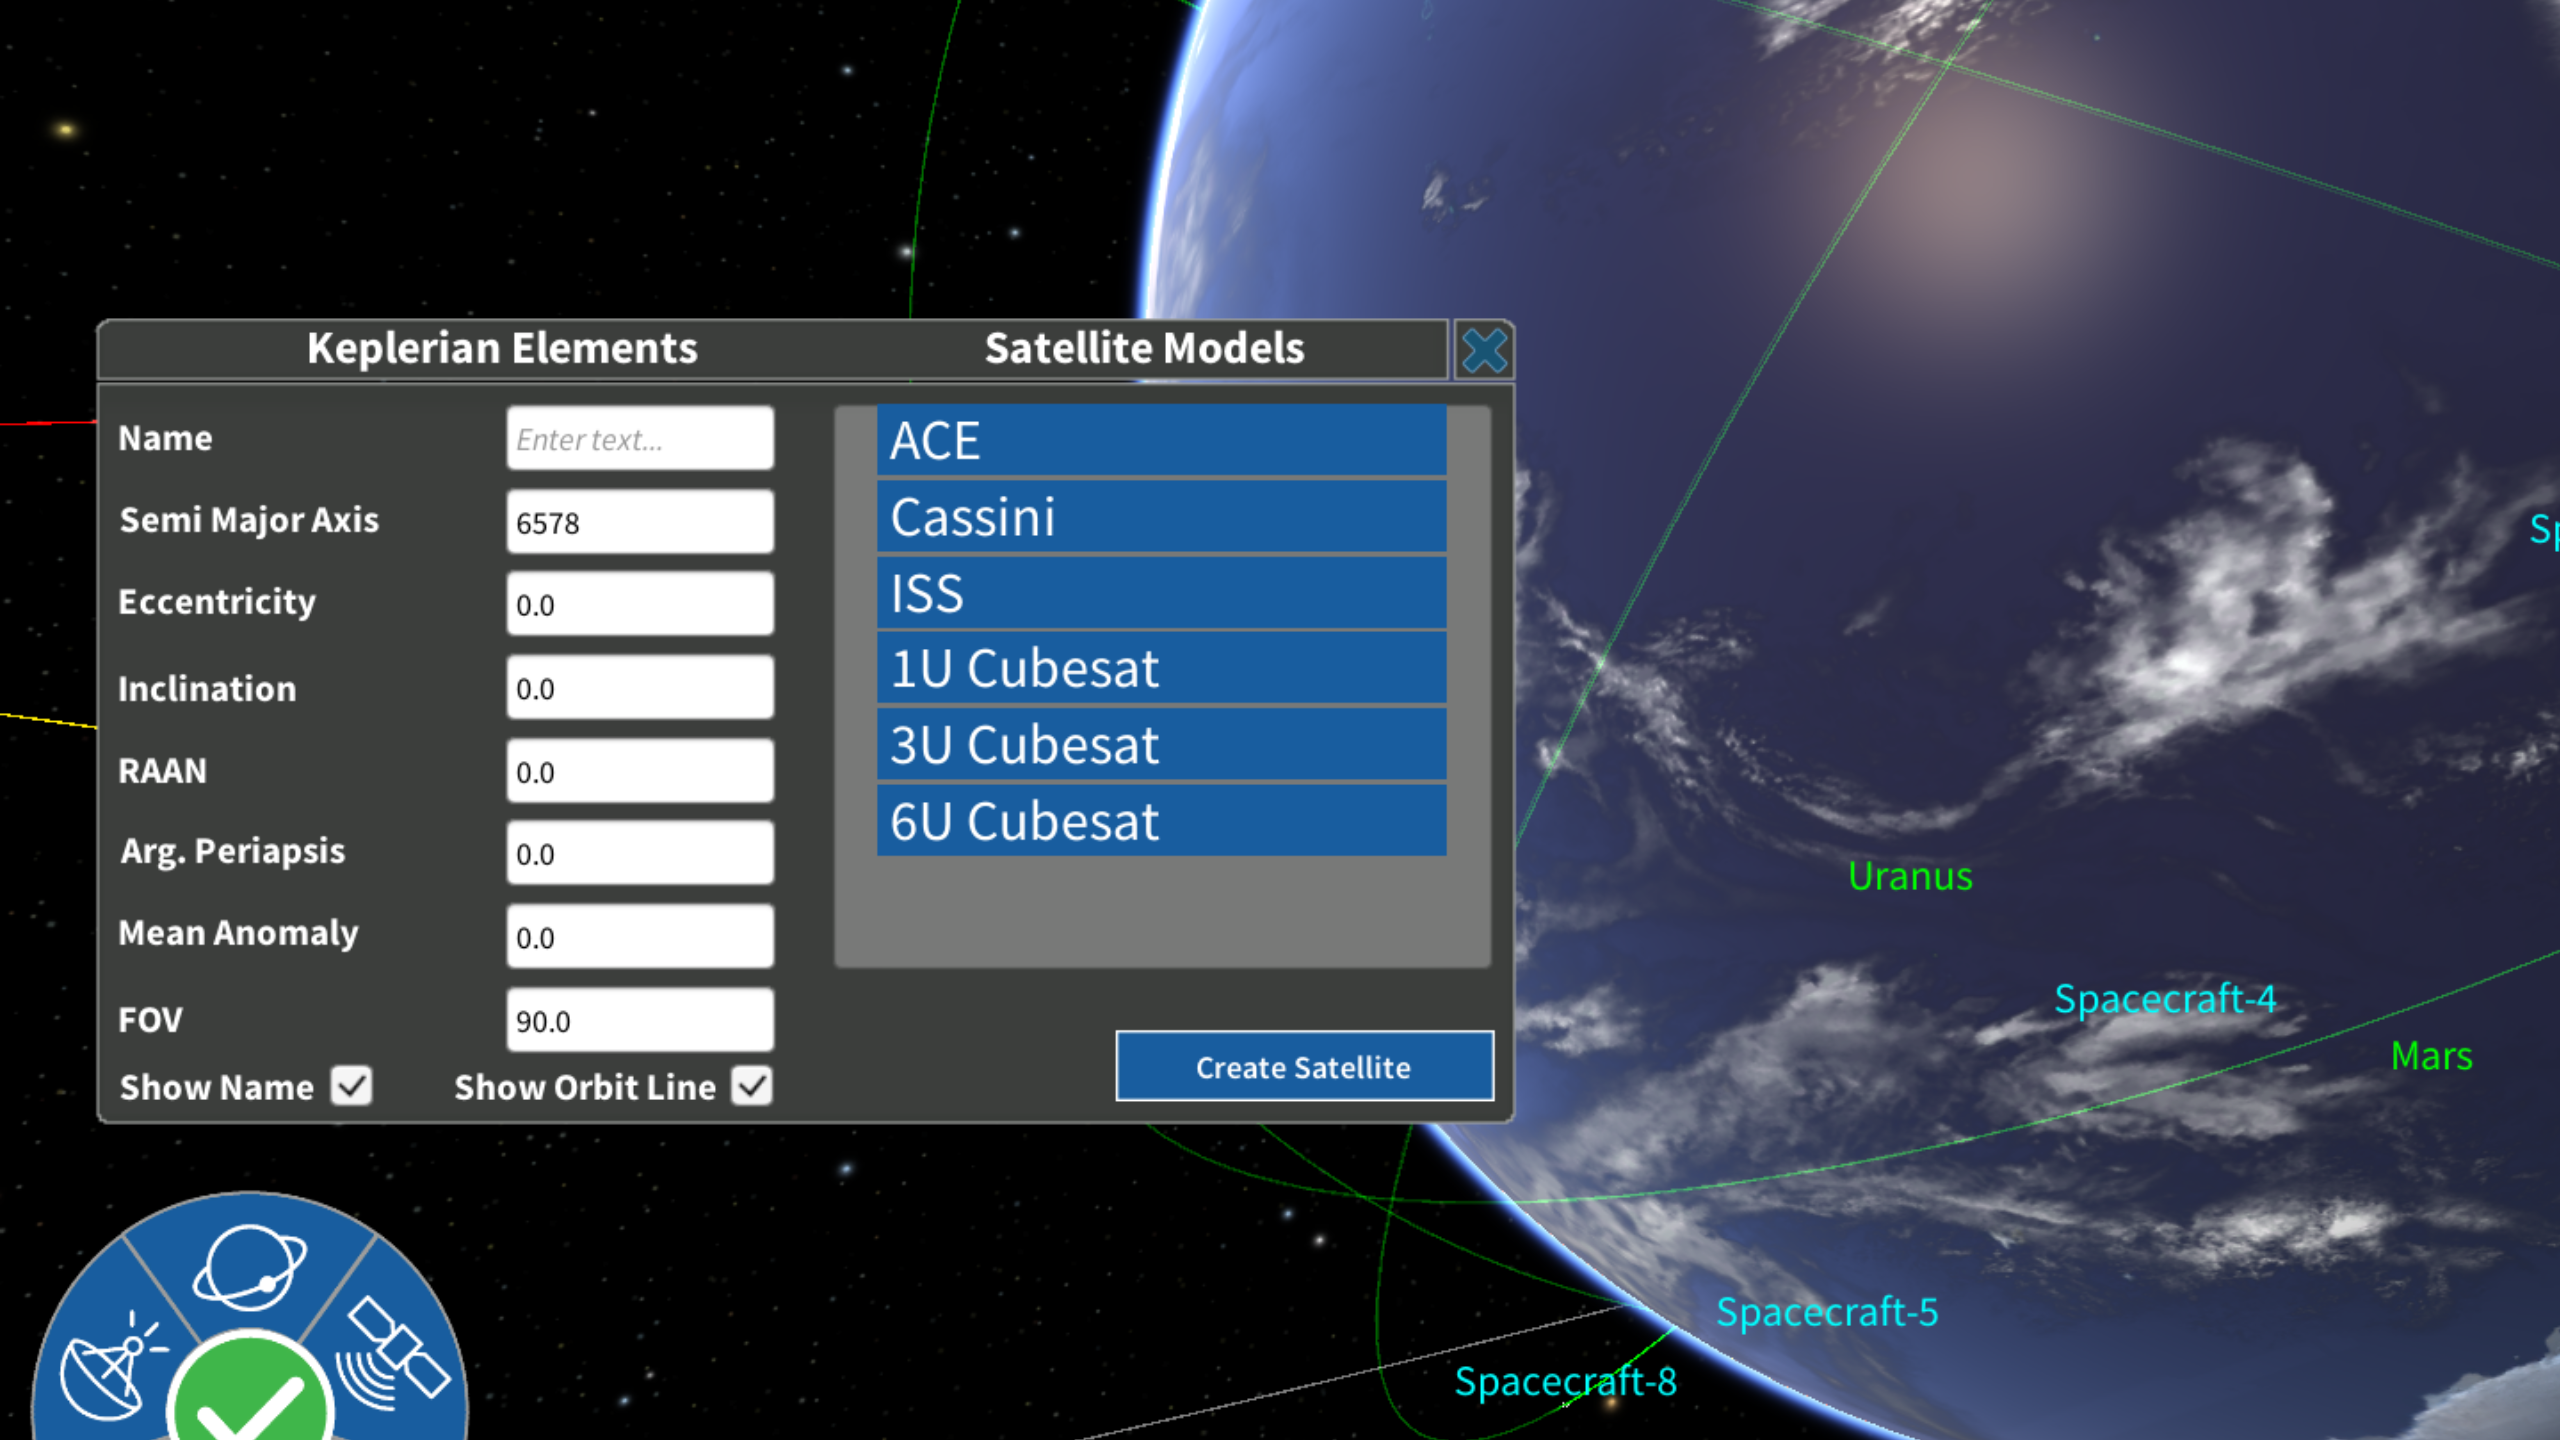
Custom Satellite allows you to create a satellite and view its data according to your parameters. In this case, adjust the 6 Keplerian elements to your needs, select the model and click ‘Create Satellite’. Your custom satellite should appear on screen.
Step 1
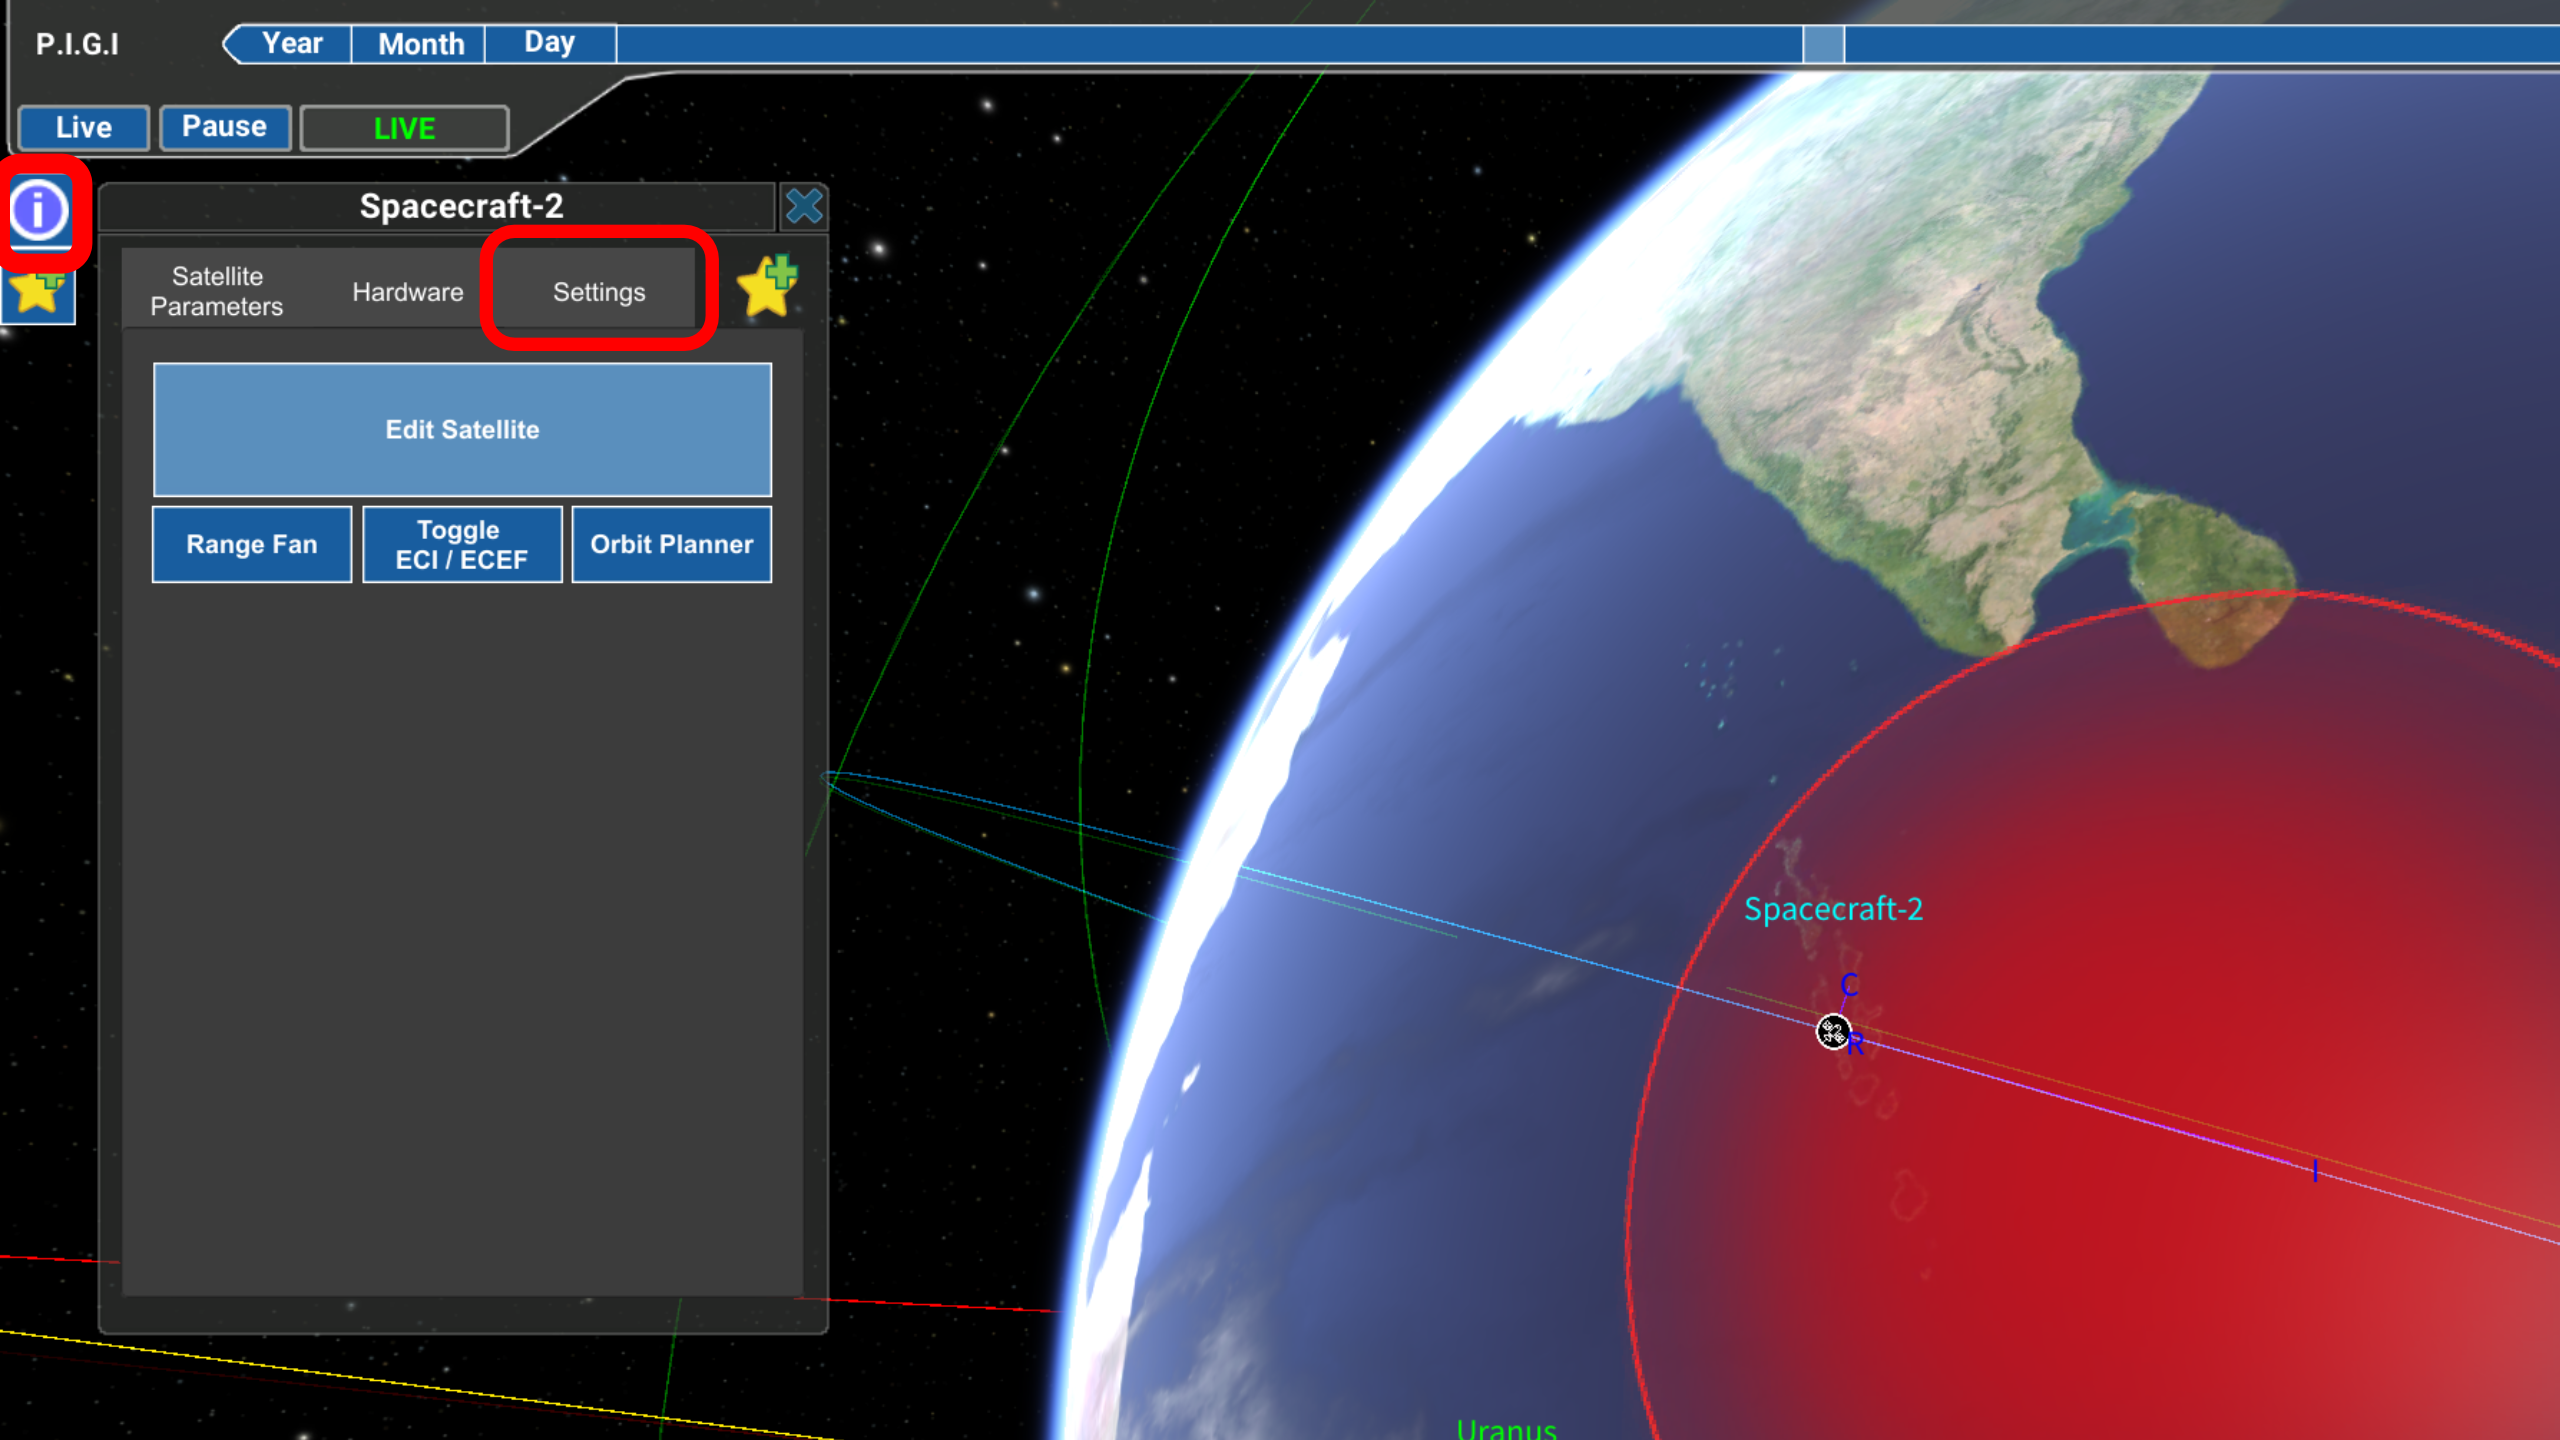
Selecting your satellite will cause a dialog box to appear on the left of your screen. If the dialog does not appear, ensure your satellite is selected and click the blue ‘info’ button on the top left of the screen.
Navigate to ‘Settings’ which is the third tab, click on ‘Edit Satellite’ which will bring up a dialog box to the right.
Step 2
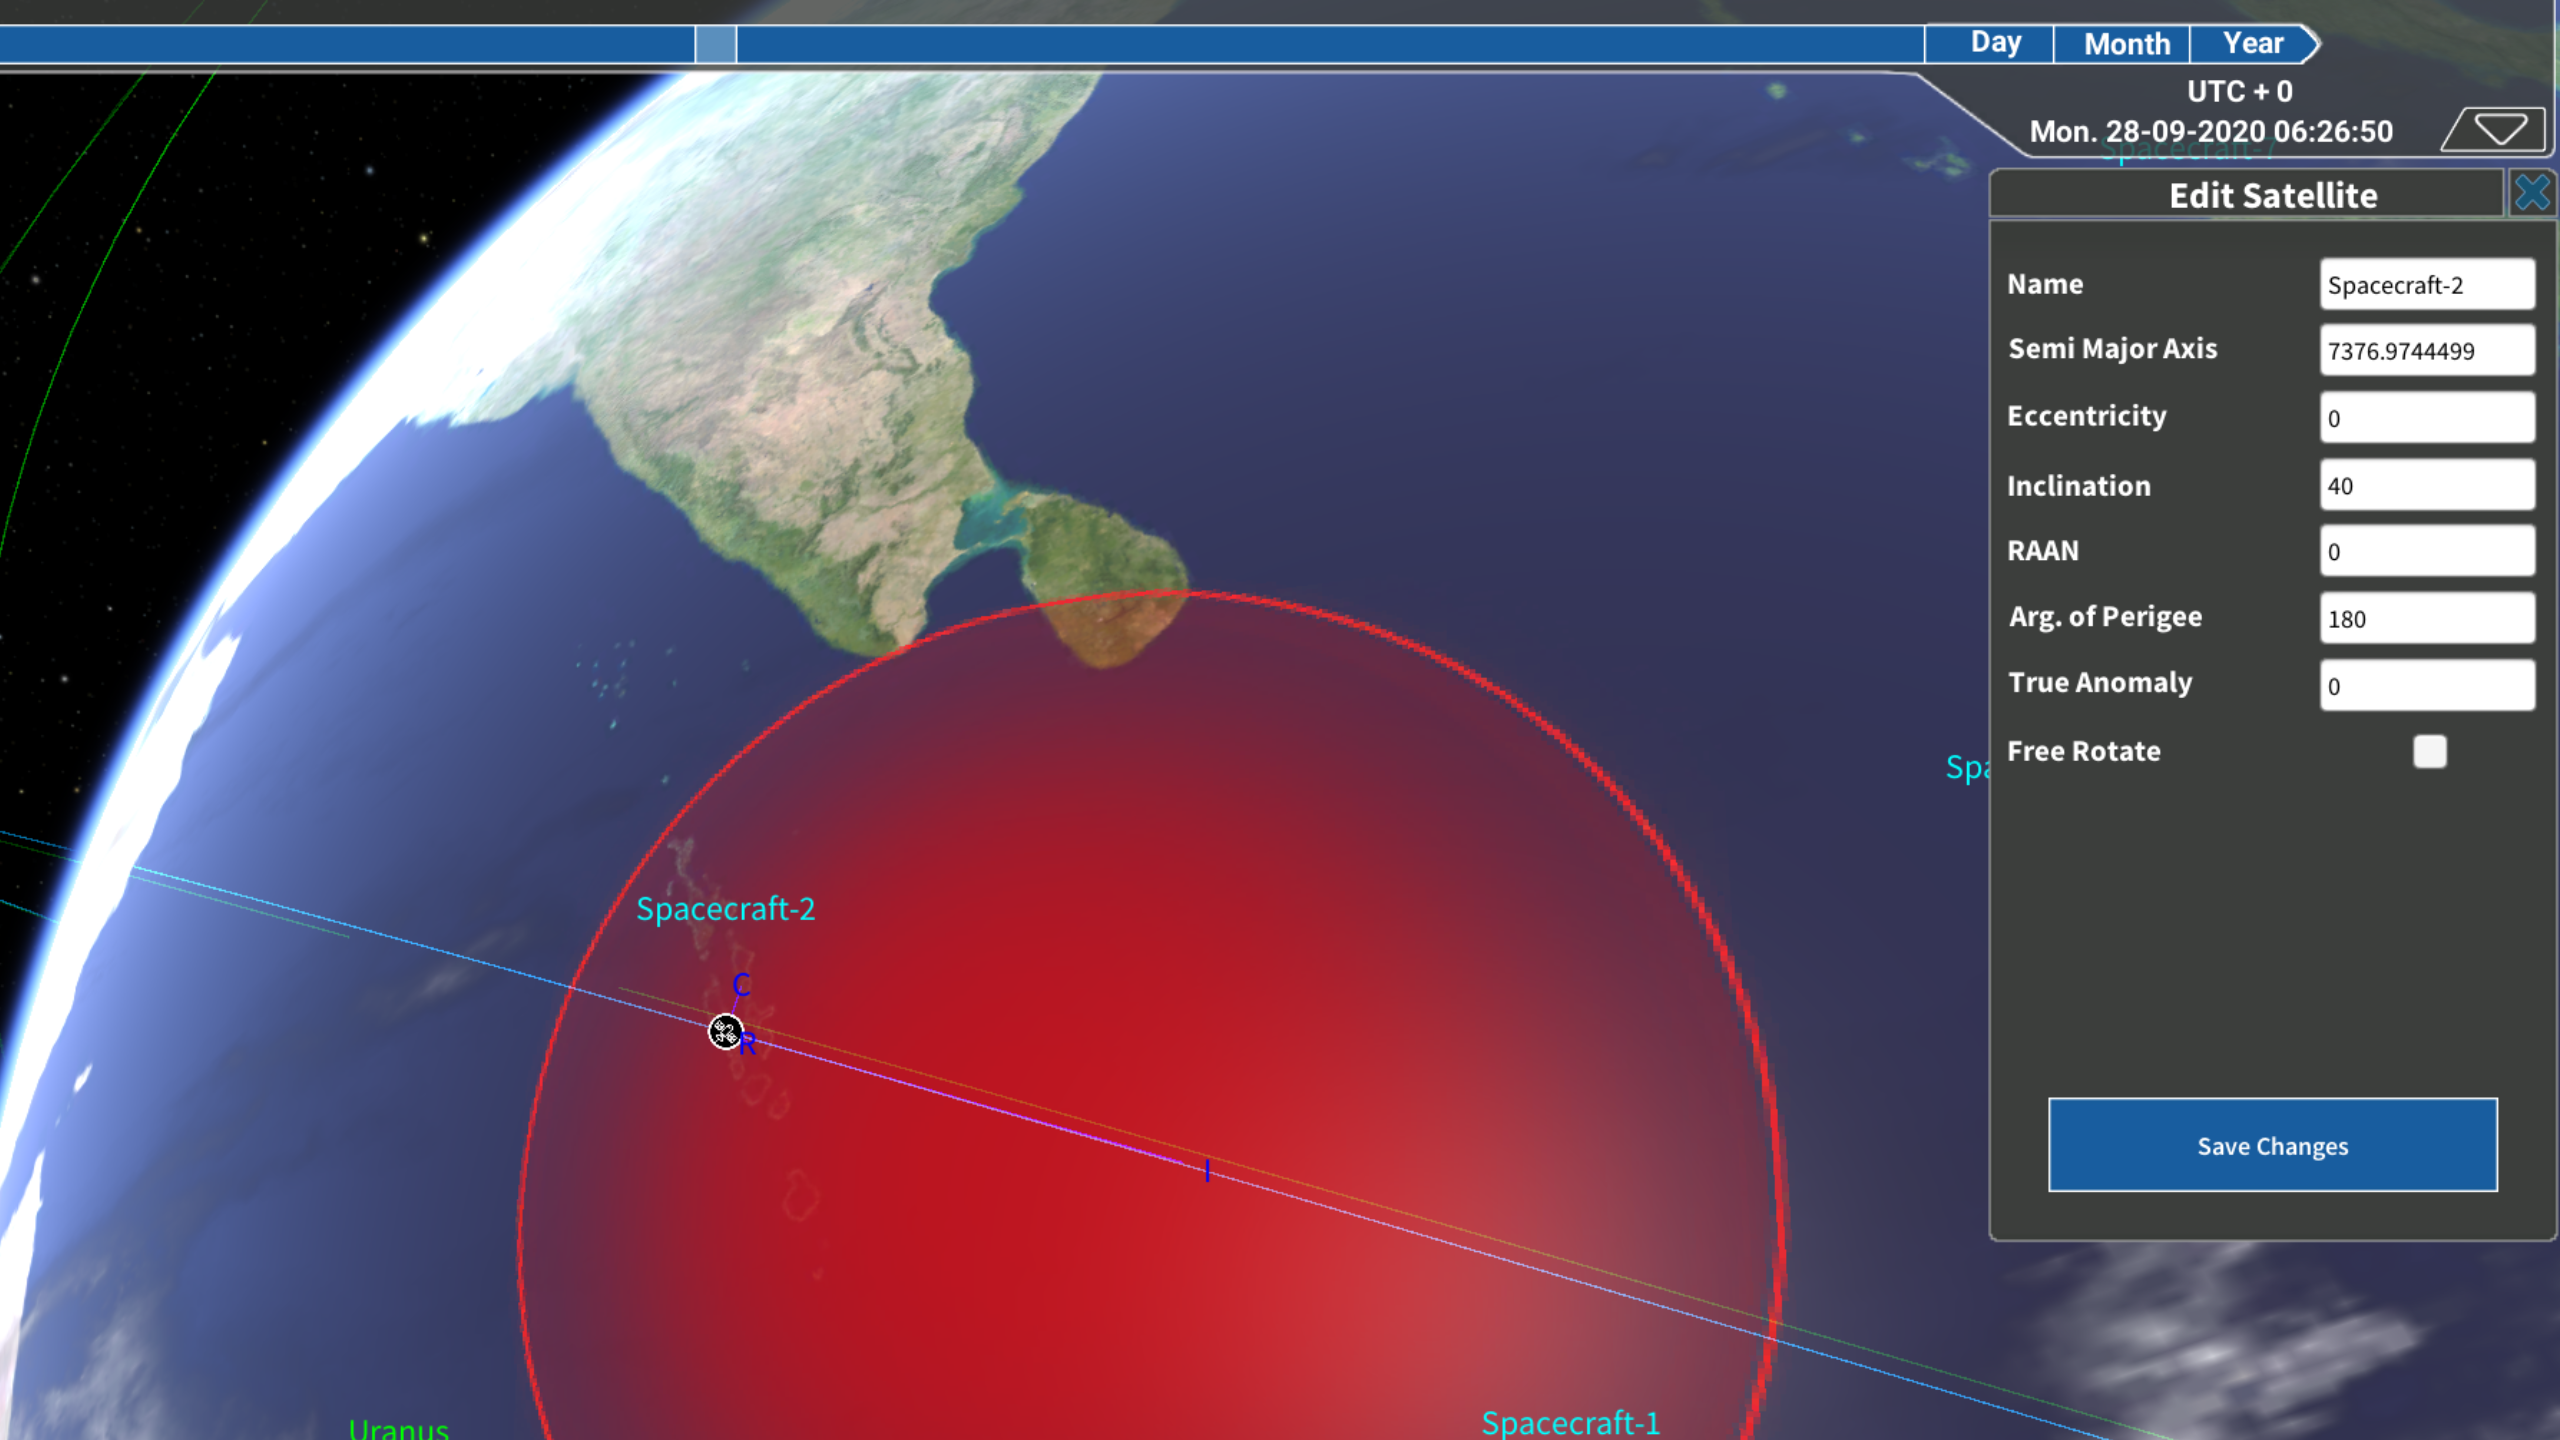
Changing the values of any of the 6 Keplerian elements will affect your satellite’s orbit and change your overpass data.